• When you click on links to various merchants on this site and make a purchase, this can result in this site earning a commission. Affiliate programs and affiliations include, but are not limited to, the eBay Partner Network.

No more Road for the Runner!

quikbird

Well-Known Member
Joined
Mar 1, 2014
Messages
3,284
Reaction score
1,090
Location
Sarasota, florida
incredible amount of work, keep the pics coming. very very informative for anyone else contemplating this work
 

Sixtynine_Bird

Well-Known Member
Joined
Nov 30, 2014
Messages
654
Reaction score
125
Location
France
You do know you can build a road runner with new parts from AMD and buy a deck lid LOL. That has been allot of work!

LOL Absolutely! ^^ that was something I wanting to share in case some of you might need a deck lid, I told myself that it would be a good idea to let you all know that AMD make this part LOL

And for sure it has been allot of work!
 

Sixtynine_Bird

Well-Known Member
Joined
Nov 30, 2014
Messages
654
Reaction score
125
Location
France
Thank you quickbird, I sure will keep the pics coming, I'll post new pics once the floors are in :)

Thanks too to roadcuda ;)
 

dmartin

Well-Known Member
Joined
Aug 30, 2013
Messages
952
Reaction score
344
Location
Georgia
It's gonna look awesome when you finish man I believe that the body work is the most teadist work but it's all worth it in the end when you get behind the wheel and fire it up for the first time nothing like[emoji1308]


Sent from my iPhone using Tapatalk
 

Sixtynine_Bird

Well-Known Member
Joined
Nov 30, 2014
Messages
654
Reaction score
125
Location
France
It's gonna look awesome when you finish man I believe that the body work is the most teadist work but it's all worth it in the end when you get behind the wheel and fire it up for the first time nothing like[emoji1308]


Sent from my iPhone using Tapatalk

Sorry I didn't take the time to answer.The last two month I have been really busy and still am... But I hope it will look awesome :)

And now I think it is time for me to take some spare time to let you where I am at this time! :)
 

Sixtynine_Bird

Well-Known Member
Joined
Nov 30, 2014
Messages
654
Reaction score
125
Location
France
Hello guys! Long time no post! Been through a lot of thing since last time I've been posting here!

First the inner fender brace are welded.
We adjusted the taillight lenses with the quarters, wasn't an easy part.

And we did something that we are really proud of because it turned out really nice but I will be waiting on your comments for that, is that between the Dutchman panel and the quarters, you've got that little junction between them like a gutter, anyway, instead of putting some seam sealer in it, we decide to braze (I guess that is the right word) with the oxy ethylene torch in those gaps. Then with this rotating tool on the compressor we sculpted it and we've got a nice finish gutter. And now the water can flow on it without going in the trunk.

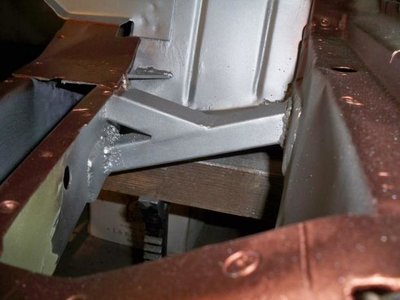
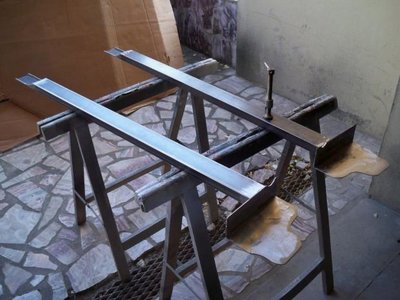
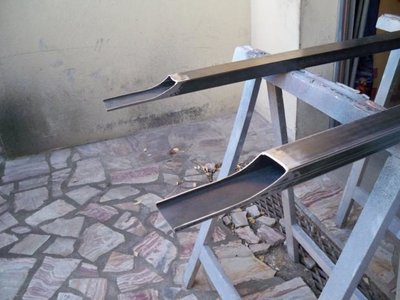
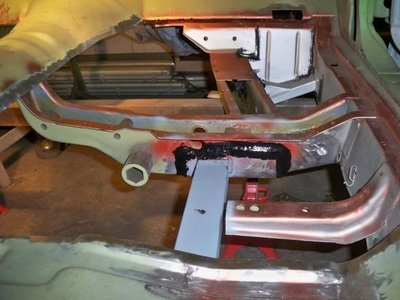
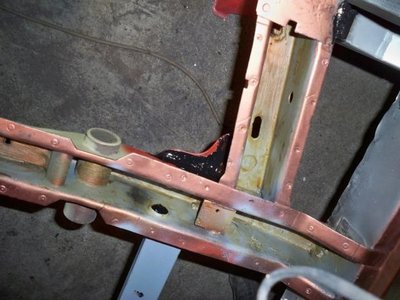
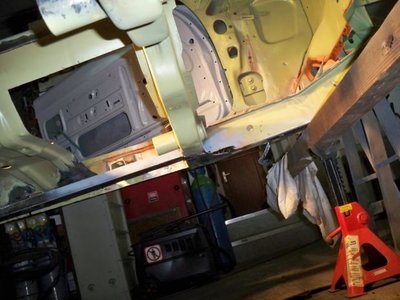
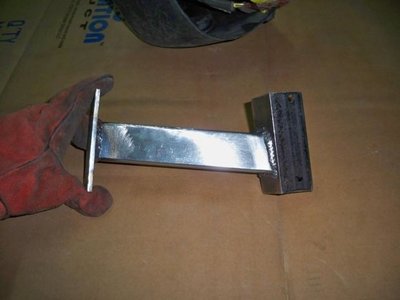
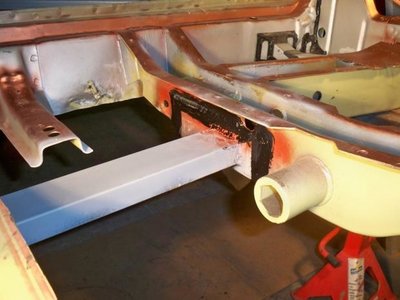
Then we went in the car, and start the floors. So we cut out the floors repaired the torsion bar crossmember on the passenger side. We cut out a piece of it then redone it with a piece of metal and welded it back. We also had to redone the reinforcement inside it. After that once the front section floor were out, it was time for us to make the front torque box. So we took a rectangular section and made a "Y" form with it. Then we welded it on the inside of the rocker and the fork of the "Y" on the frame rail. Pics will come it will be easier to understand because it is quite complicate to explain it lol

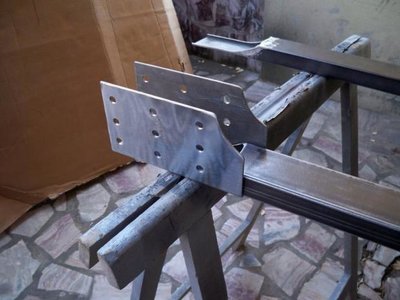
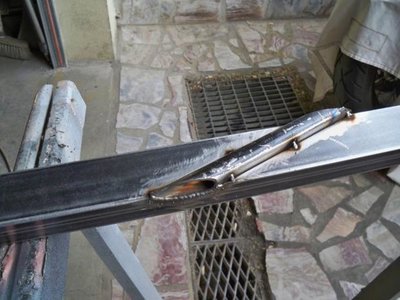
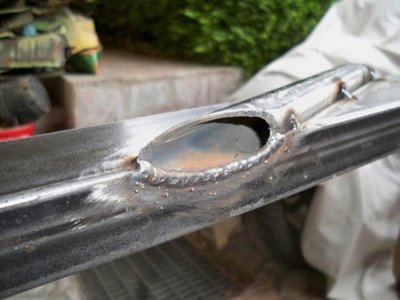
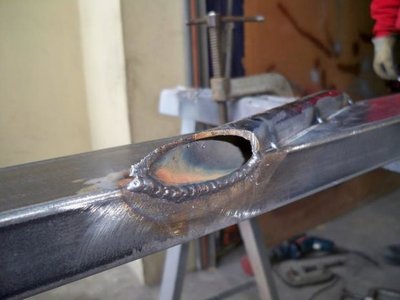
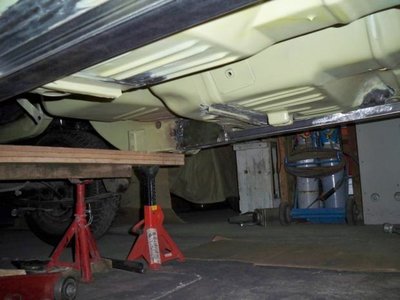
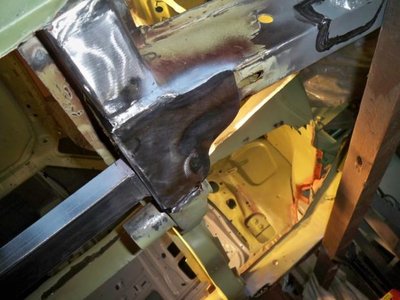
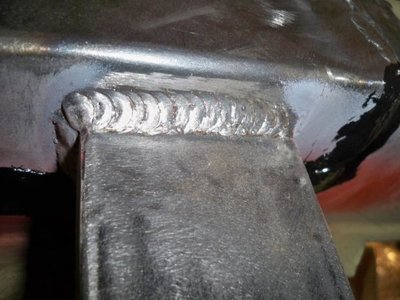
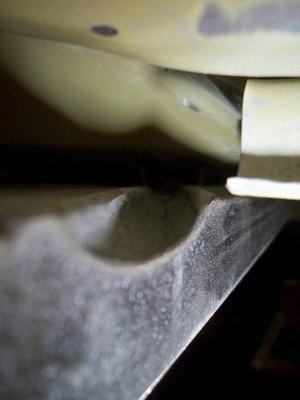
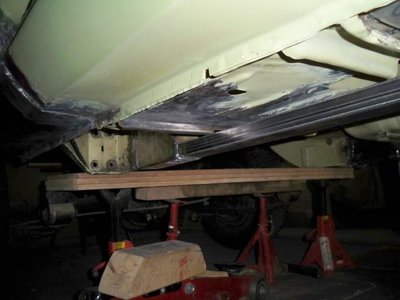
Once it was done, we manufactured our own subframe connectors as well. We finally welded the whole thing up; for the driver side it was a bit longer because we had to figure it out a pass through for the e-brake cable. The subframe weren't high enough to drill it and make a hole from both side and pass the e-brake cable inside it, but it was lying on the top of the subframe and it was bending the cable. So we had to make a notch in the subframe. For tat we use a handlebar from a bicycle, cut it open in half and welded it on the subframe. So now the cable got a nice channel and it fits pretty well! :)

Once the subframe were in, we began the welding process of the front floor section. Tonight more welding and finally the floors are in!

And after that the car will be coming back from the dead! Because no more repair or body work! Youhou! what a relief! Then just have to make the rear torque box, make some brackets for the rear sway bar, then seam sealed the whole car, and then it could go out of the house for the paint shop! hope current this summer it'll be painted.

We can finally see a sample of the light at the end of that tunnel!

I know this is a tone to read sorry about that.

Thanks for your time and I will add some pic soon!

Thomas
 

dmartin

Well-Known Member
Joined
Aug 30, 2013
Messages
952
Reaction score
344
Location
Georgia
Man those rear quarters remind me the the AMD quarters I bought and put in looks great big guy


Sent from my iPhone using Tapatalk
 

Sixtynine_Bird

Well-Known Member
Joined
Nov 30, 2014
Messages
654
Reaction score
125
Location
France
Thanks dmartin, wasn't an easy task those rear quarters, a real pain! But now I'm glad we did it, looks better than the previous one, especially when the previous one are mounted in the wrong way...
 

Sixtynine_Bird

Well-Known Member
Joined
Nov 30, 2014
Messages
654
Reaction score
125
Location
France
here comes the pics! :)

Lets start with the inner fender brace:

100_5401.jpg
100_5446.jpg
100_5447.jpg

Don't have any pics when we adjusted the tailight leses but got one or two of the repairs we did on the stud :

100_5380.jpg

Now lets se what I was talking about on the dutchman panel and the gaps wit the quarters :
100_5402.jpg
100_5444.jpg
100_5445.jpg

100_5401.jpg

100_5446.jpg

100_5447.jpg

100_5380.jpg

100_5402.jpg

100_5444.jpg

100_5445.jpg
 

Sixtynine_Bird

Well-Known Member
Joined
Nov 30, 2014
Messages
654
Reaction score
125
Location
France
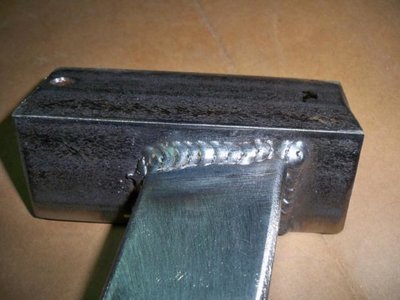
Before welding back the floors lets do the fun part! The "Y" torque box, so first we did a straight bar welded on a plate each side of the extremity. With one plate in a "L" form and a sraight one. The "L" forme one, is welded on the bottom of the frame rail and the straight the inside of the rocker. Once it welded on the car, we took an other piece of a bar of bare metal and welded it on the top of the frame rail and the straight bar to form a "Y" with the torque box, lets see the pics :

100_5386.jpg
100_5387.jpg
100_5399.jpg

100_5386.jpg

100_5387.jpg

100_5399.jpg
 

Sixtynine_Bird

Well-Known Member
Joined
Nov 30, 2014
Messages
654
Reaction score
125
Location
France
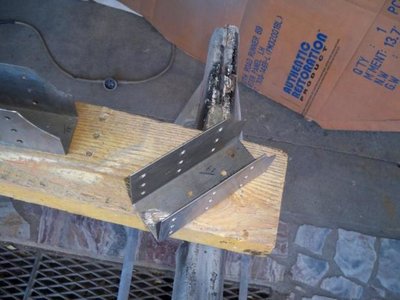
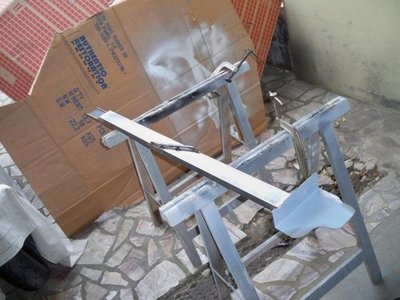
After that here comes the time for the subframe connectors here is the fab process, for the handlebar from the bicycle I forgot to took it in picture when it was finished, so took one after I welded the subframe on the car hope you'll see enough, not an easy shoot! but you'll see the channel that it makes for the e-brake cable :)

100_5403.jpg
100_5405.jpg
100_5407.jpg
100_5408.jpg
100_5409.jpg
100_5412.jpg
100_5413.jpg
100_5414.jpg
100_5415.jpg
100_5416.jpg

100_5403.jpg

100_5405.jpg

100_5407.jpg

100_5408.jpg

100_5409.jpg

100_5412.jpg

100_5413.jpg

100_5414.jpg

100_5415.jpg

100_5416.jpg
 

Sixtynine_Bird

Well-Known Member
Joined
Nov 30, 2014
Messages
654
Reaction score
125
Location
France
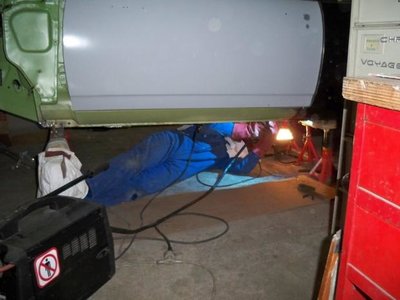
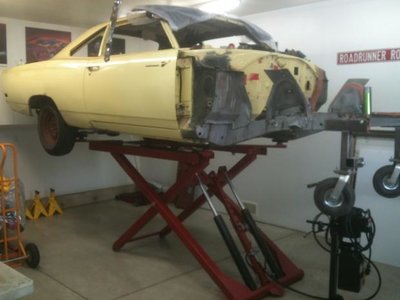
Welding the sub co en the car was a real pain! Wish we could have a rotisserie instead of the jack stands, it would have been easier. But we do with what we have that is the rule!
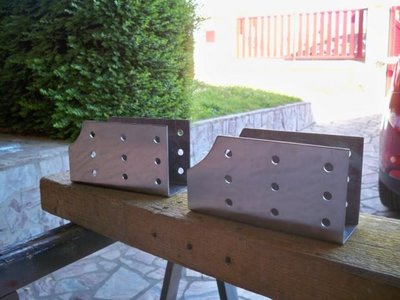
The "U" form parts with a lot of holes are the parts that goes on the rear frame rails and support the end of the sub co.

100_5417.jpg
100_5418.jpg
100_5420.jpg
100_5421.jpg
100_5423.jpg
100_5424.jpg
100_5425.jpg
100_5428.jpg
100_5437.JPG

100_5417.jpg

100_5418.jpg

100_5420.jpg

100_5421.jpg

100_5423.jpg

100_5424.jpg

100_5425.jpg

100_5428.jpg

100_5437.JPG
 

Sixtynine_Bird

Well-Known Member
Joined
Nov 30, 2014
Messages
654
Reaction score
125
Location
France
And finally once everything were in, we finally could do the floors, and we finished them last night but didn't take pics of it I will and then I'll post again:

100_5396.jpg
100_5400.jpg
100_5442.jpg

100_5396.jpg

100_5400.jpg

100_5442.jpg
 

Sixtynine_Bird

Well-Known Member
Joined
Nov 30, 2014
Messages
654
Reaction score
125
Location
France
So that is where we are at this point, lot of work to go yet before paint shop, but it coming along slowly :)

The last modifications are going to be the rear torque box and make something up for the installation of a rear sway bar. Still have to study this part.
 

dmartin

Well-Known Member
Joined
Aug 30, 2013
Messages
952
Reaction score
344
Location
Georgia
Man you sure beefing up that unibody I sure hope all is square and right brother


Sent from my iPhone using Tapatalk
 

gkent

Member
Joined
Apr 24, 2017
Messages
21
Reaction score
16
Location
Ontario
A wise decision is to restore or replace parts as you remove them. There is nothing worse than having a completely finished body sitting in the shop gathering dust while you then restore or wait for replacement parts.

Here's mine - everything that is NOT on the car has already been restored, wrapped and packed away for fast reassembly. I haven't driven this since 1985 - when its done I don't want to spend years putting it back together!
IMG_1009.jpg

IMG_1009.jpg
 
Last edited:
Back
Top