• When you click on links to various merchants on this site and make a purchase, this can result in this site earning a commission. Affiliate programs and affiliations include, but are not limited to, the eBay Partner Network.

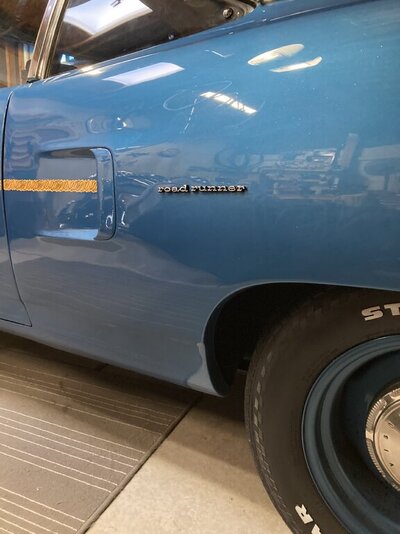
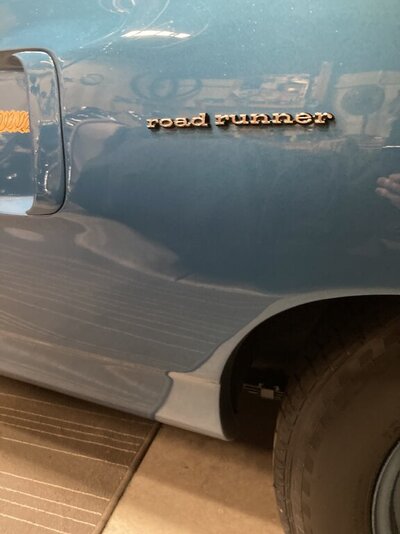
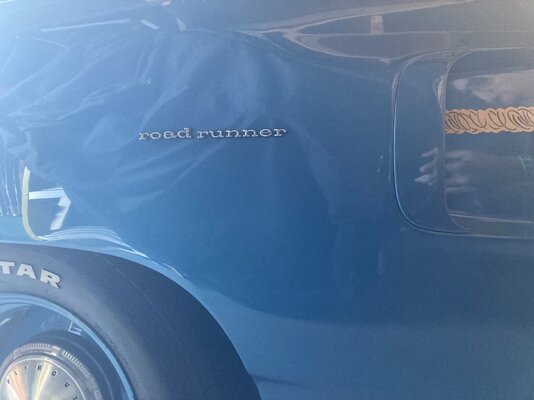
70 Roadrunner quarter panel badging?

WWheeler

Well-Known Member
Joined
Mar 7, 2019
Messages
160
Reaction score
123
Location
Dallas
I measured the emblems in relation to the studs.
- The distance from the centerline of the stud to the edge of the letters "R" and "D" in road (RoaD), is exactly 3/16". That distance is the same for the "R" in runner (Runner), 3/16".
- The distance from the edge of the last letter "R" in runner (runneR) to the centerline of the stud is 13/16".
[You can also see this with 1968 man's picture of his emblem with studs on page 1. The stud is further away from the end on the last "R" in runner.]
- The gap between the words road and runner is exactly 1/4".

So using that and 1968 man's layout dimensions, you should be able to place your emblems without studs.

You might lay that out on paper first and see if that makes sense.
 
Last edited:

Russ69Runner

Well-Known Member
Joined
Aug 4, 2016
Messages
7,787
Reaction score
3,337
Location
Lake Wales Fl.
And I thought measuring out the letters on a 69 door was bad. With the scoop and all in the way can see your problem's. Hey good luck you will get it all done and it will look nice for sure. :thumbsup2:
 

woodwiz

Well-Known Member
Joined
Dec 10, 2020
Messages
515
Reaction score
382
Location
Tucson,Az.
I was spraying the trunk the last few days with rust stoppers(undercoatings). The light bulb went on as to whether the quarter panels have the holes for the RR emblems filled in. This car has had new quarters welded in and no one put the emblems back on....I have the adhesive ones anyway so i guess it does'nt really matter. Just thought i'd share my revelation with everyone. Thank you so much for the measurements for those emblems! I will post a pic when installed.
 

Russ69Runner

Well-Known Member
Joined
Aug 4, 2016
Messages
7,787
Reaction score
3,337
Location
Lake Wales Fl.
Put mine on with the two side 3M tape hope it hold's up. But they do not move once they are on. So measure and use tape to mark where their going and you will be fine.
 

MoparDan

Well-Known Member
Joined
Mar 15, 2021
Messages
591
Reaction score
660
Location
Stuarts Draft Virginia.
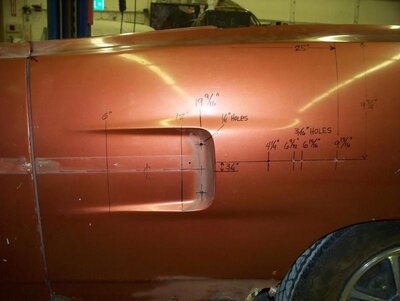
70RRQuarterscoopandemblemDems.jpg
I don't have the holes for the emblem.Did all 70 roadrunners have this emblem at the scoop or could theholes have been filled at some point due to bodywork?? Also is there a version of the emblem that does not need holes drilled in the body?
If the quarters were replaced there wouldn't be any holes. I have a set of NOS stick on emblems that I would part with for a decent price. If you want to drill the holes, here's a diagram to tell you where to drill the holes.
 

WWheeler

Well-Known Member
Joined
Mar 7, 2019
Messages
160
Reaction score
123
Location
Dallas
Beautiful! I already drilled mine and will see how what I did compare to your excellent layout.
 

WWheeler

Well-Known Member
Joined
Mar 7, 2019
Messages
160
Reaction score
123
Location
Dallas
Well, thanks for posting that here. I like this site because it has a manageable amount of traffic.
 

woodwiz

Well-Known Member
Joined
Dec 10, 2020
Messages
515
Reaction score
382
Location
Tucson,Az.
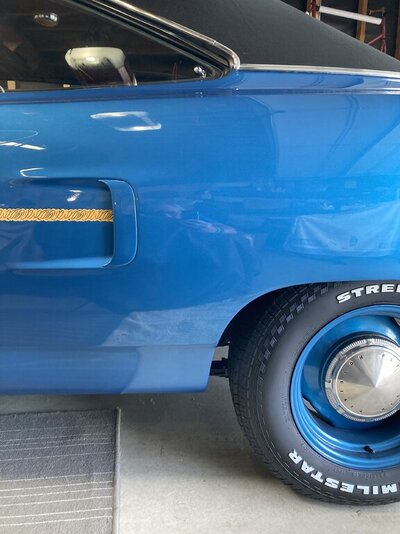
Well it’s cooling off here in the desert somewhat and I’m thinking about applying my 70 RR badging to the quarter panels(adhesive type).I need to know: Am I applying them level to the ground as a bubble level indicates or am I applying them in relation to my dust trail decal after taking the measurement from the leading scoop edge and using that dust trail as my template??

84962510-32D9-440B-BA3D-D9F7C41CCBF9.jpeg
 

WWheeler

Well-Known Member
Joined
Mar 7, 2019
Messages
160
Reaction score
123
Location
Dallas
I would think since you have the dust trail, you have to install the emblem on the same line as that.
 

woodwiz

Well-Known Member
Joined
Dec 10, 2020
Messages
515
Reaction score
382
Location
Tucson,Az.
That’s my thought. I’m thinking of using the bottom line of the dust trail to follow over and past the side scoop.
It seems by looking at a lot of 70’s that other than getting the measurement from the scoop rearward,that it seems to be at the right spot. When I put a small level on the dust trail where it runs into the scoop it is not level to the ground. So it will run even to the trail and look right when viewed.
 

woodwiz

Well-Known Member
Joined
Dec 10, 2020
Messages
515
Reaction score
382
Location
Tucson,Az.
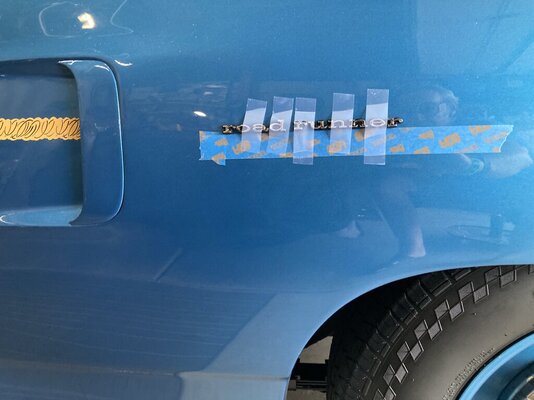
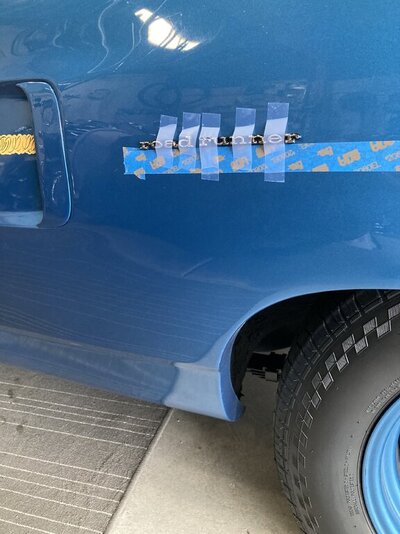
Well after much measuring and stressing out I came to the right distance from the leading edge of the scoop and used the bottom edge of the dust trail as the base to place the emblems and a little scotch tape overnight in case that emblem tape lets go. Gotta have a beerskie after that and hope for a good repeat on the other side tomorrow.

36F0CEBF-F901-4088-8B5C-3B13FCBE8132.jpeg

E3F0D656-BE24-42BD-9A8C-B42F6805861E.jpeg
 

WWheeler

Well-Known Member
Joined
Mar 7, 2019
Messages
160
Reaction score
123
Location
Dallas
You could double check what you have with post #65. If they are close, go for it.
 

woodwiz

Well-Known Member
Joined
Dec 10, 2020
Messages
515
Reaction score
382
Location
Tucson,Az.
This the final result unless I of course get all anal about it and find something wrong and try to fix something that may or may not be there. Even back in the day they didn’t do little detail work perfectly.

0BB67656-FB82-4243-8052-F0838BE64F56.jpeg

2FD0505C-B3D7-47CE-87A3-D238EA1DB243.jpeg
 

woodwiz

Well-Known Member
Joined
Dec 10, 2020
Messages
515
Reaction score
382
Location
Tucson,Az.
Thanks! Now for the other side. These are the badges with adhesive backs on them. Do any of you guys think the sun and heat here in the desert will soften the adhesive backing on these?…Thanks!
 

woodwiz

Well-Known Member
Joined
Dec 10, 2020
Messages
515
Reaction score
382
Location
Tucson,Az.
Got the right side on last night,now it is officially badged Road Runner. She be complete

B7B29A52-5ED9-4DF6-BCB6-1CF707DAE434.jpeg
 
Back
Top