• When you click on links to various merchants on this site and make a purchase, this can result in this site earning a commission. Affiliate programs and affiliations include, but are not limited to, the eBay Partner Network.

Seems a little steep

A31PKG

Well-Known Member
Joined
Apr 28, 2010
Messages
880
Reaction score
8
Location
Mid-Atlantic
Does this seem a little steep , I was checking around for someone to reinstall the front and rear windows in my rr , no one in the area will touch it except this outfit out of Burlington Vt "Crash auto glass" They said they would send two guys @ $200 per hour and it could take two to five hours , with no guarantees , if the glass breaks while installing its tuff titty said the kitty . I might try to install the rear glass but not the front . Any suggestions or recommendations ? I really don't want to spend a $1000 , seems crazy !

I've done several and you will be surprised at how easy it is! The rear just sets in place. I use the 5/16" dia. window glass gasket...comes in a roll with a couple rubber blocks to put in the bottom channel for proper spacing. You can trim the blocks as needed. Once the glass is pressed into place, the 5/16" dia. allows for plenty (usually) of room to re-install the window trim. For the front, just set the gasket in the pinchwelds, even it up, set the lower edge of the glass in the channel, and then work it into the channel all the way around. Then tuck in the locking flap....DONE! The gasket is not cheap...It was out of production for a while and the prices went thru the roof...
 

69383RR

Well-Known Member
Joined
Jan 28, 2012
Messages
447
Reaction score
0
Location
up state vermont
I've done several and you will be surprised at how easy it is! The rear just sets in place. I use the 5/16" dia. window glass gasket...comes in a roll with a couple rubber blocks to put in the bottom channel for proper spacing. You can trim the blocks as needed. Once the glass is pressed into place, the 5/16" dia. allows for plenty (usually) of room to re-install the window trim. For the front, just set the gasket in the pinchwelds, even it up, set the lower edge of the glass in the channel, and then work it into the channel all the way around. Then tuck in the locking flap....DONE! The gasket is not cheap...It was out of production for a while and the prices went thru the roof...

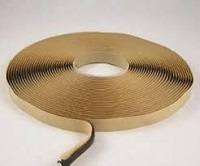
So now I'm confused ,I thought the rear window went in with the black cocking sealer and only the front window got the gasket .
 

Basketcase

Keeper of the Green
Joined
Sep 10, 2008
Messages
14,415
Reaction score
299
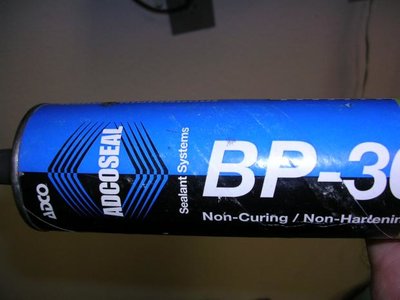
cocking (buytle) in the rear, gasket in the front
 

A31PKG

Well-Known Member
Joined
Apr 28, 2010
Messages
880
Reaction score
8
Location
Mid-Atlantic
What he said...:yeathat:

The sealer for the rear looks like this:

window sealer.jpg
 
Last edited:

69383RR

Well-Known Member
Joined
Jan 28, 2012
Messages
447
Reaction score
0
Location
up state vermont
Ok now I got ya , sometimes all it takes is a picture ,thanks a lot ! to bad you guys don't live around here .
 
Last edited:

dbc105

Well-Known Member
Joined
Apr 13, 2009
Messages
80
Reaction score
17
Look for info on pulling the windshield in with a rope. Years ago I worked at PPG and that is how we installed anything that used a gasket type seal. Also like one guy said, use a lot of silicone spray.
 

69hemibeep

Sponge Bob Square Wheels
Joined
Sep 10, 2008
Messages
22,217
Reaction score
2,457
Location
AZ Desert,
You might want to get some of this to put on the pinch weld before the gasket. Even the factory did this because they didn't seal well. Just a few inches in the bottom corners of the windshield.

roadrunner restoration 928.jpg
 
Last edited:
Back
Top