• When you click on links to various merchants on this site and make a purchase, this can result in this site earning a commission. Affiliate programs and affiliations include, but are not limited to, the eBay Partner Network.

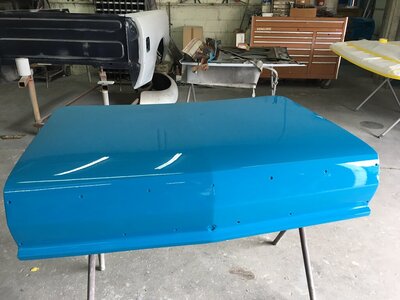
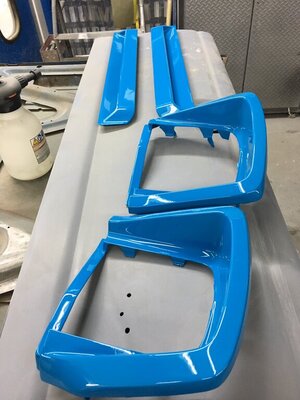
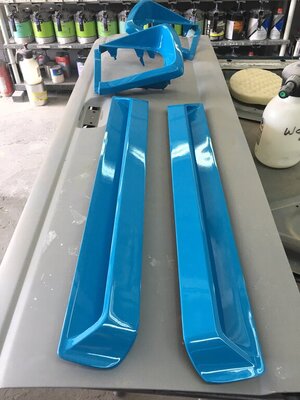
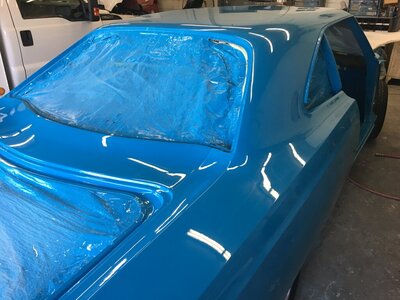
Pulling into the final stretch before paint

Zizzinator

Member
Joined
May 26, 2020
Messages
22
Reaction score
37
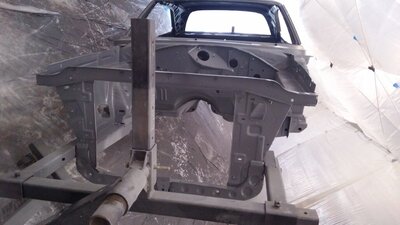
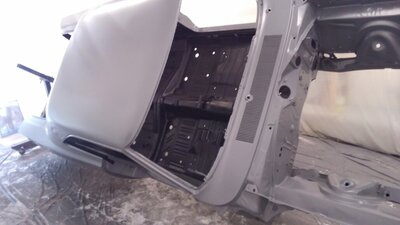
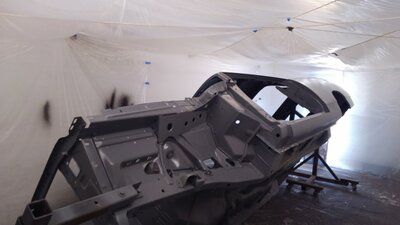
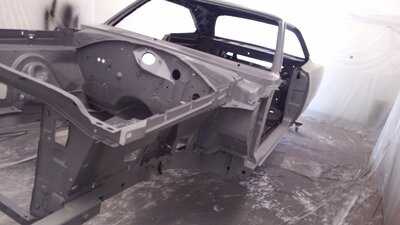
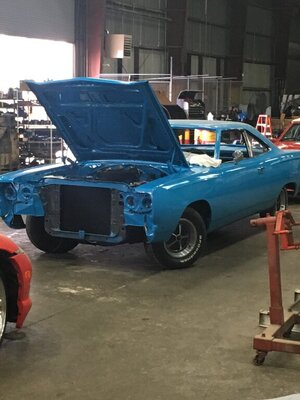
5 years... 5 long damn years. 5 years, 3 restoration shops, 2 shells, a donor body, and almost a full year doing it myself and she's finally almost ready for final paint.

All that's left is to wait for the store to match the color samples I gave them, clean the garage and booth spotless, mask the shell, and pray for a "cold" night in August.

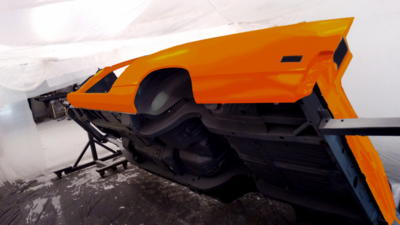
She's in grey sealer atm and aside from 1 or 2 tiny spots on the passenger side quarter panel the overall lines and finish came out a helluva lot better than I expected.

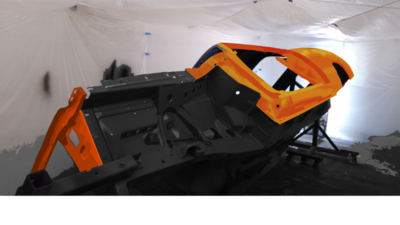
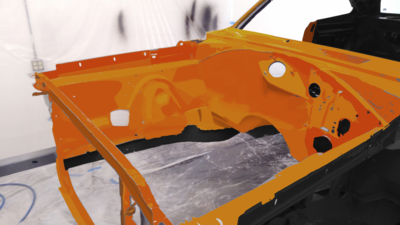
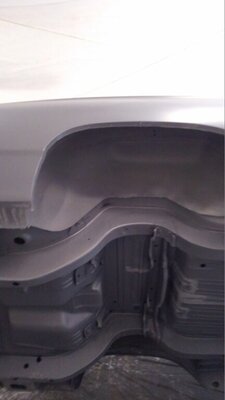
I also ended up making some "photoshopped" pics with color to plan out the underside masking (the ones with the craptastic orange shading). Decided doing the orange all under the car would end up looking like crap as it got dirty and chipped from road debris. opted for the eastwood ceramic chassis black and will probly follow that up with a high strength clear just to give it that little extra protection from the poor quality roads in my area. the satin finish also did a good job of smoothing out the surface wrinkles and imperfections of the factory welded areas.

Hard to get beauty shots in the booth so apologies for the cock-eyed angles and tilted perspectives. When the temps drop tonight I'll snag some pics of the finished underside.
KIMG1626.JPG KIMG1629.JPG KIMG1630.JPG KIMG1631.JPG KIMG1633.JPG
KIMG1624.png KIMG1631.png KIMG1632.png
 

Russ69Runner

Well-Known Member
Joined
Aug 4, 2016
Messages
7,795
Reaction score
3,352
Location
Lake Wales Fl.
Your getting their. I feel you pain on the amount of time we have to put into these car's. Yes start a photo garage. I got at least that much time in this runner. But now sitting on wheels and getting to bolt thing's on sure will make you feel better about the time you have invested. Good job don't give up the ship so they say. Keep us posted on the progress. Zizzinator. :thumbsup2::thumbsup2::thumbsup2:
 

dodgey68

Well-Known Member
Joined
Jul 16, 2019
Messages
94
Reaction score
87
Location
Australia victoria
wow,, nice, more pics please
,i got a running driving roady , drove it home after purchasing it, noticed an issue, put it up on hoist, cut some rust out and thats as far as i gotton, 18 months so far,,, dam pisses me off, not time ,, fixing everyone elses car but not mine,
 

roadrunninMark

Well-Known Member
Joined
Jan 14, 2011
Messages
192
Reaction score
155
Location
GA
I hear you... mine came off the road in 93..... 2 paint shops, moved a number of times, career changes, etc.. In the shop now that she will be finished in, hoping Oct.! Hang in there :)
 

Zizzinator

Member
Joined
May 26, 2020
Messages
22
Reaction score
37
So I just started clear coating the yesterday and have run into what I am hoping is just a small problem easily resolved by some elbow grease.

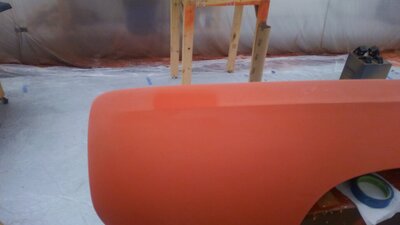
The orange color I picked is a custom mix of Tangiers and Omaha orange, was literally the only way I was able to get the right color. The problem I've run into is that it has a tendency to "rash" if it's so much even lightly scuffed with paper.
What i mean is it normally has a light orange tinge to it but when I need to knock a high spot off it say a little piece of dust fleck before clear, anywhere the paper touches it, it turns a reddish hue. and I'm talking like 4 tones darker red. It's the weirdest thing I have personally ever seen paint do. It's like when it comes out of the gun the red pigments are settling below the rest of the colors creating a dark layer. It looks amazing when it's orange because I'm guessing the red layer gives it that deep contrast but it really fubar'd the hood and fender in a few spots where I lightly touch it. I'm talking "lightly" as in light wisps with 1500 grit just to knock a few tiny pin prick spots out. even the diamont base coat instructions note that you can if needed hit with 1000 grit wet before clear coat so long as it's air dried and cleaned with a tack cloth.

Worst part is I didn't even see the discoloration until after the clear was applied...

So I'm stuck at the moment trying to figure out how to fix it without resorting to scrapping the whole project (I don't have time in my garage lease to strip the panels down and start over).
Has anyone ever run into a similar issue where the basecoat ended up with a discoloration in it? and it wasn't noticeable until after clear was applied?


My plan at the moment is to do spot repair for the rash zones, stripping the clear off with 120 grit until i just touch the color, even it out and scuff it with 800 in a good area around, lightly spray with color overlapping a little of the feathered clear around the patch (since I can't strip the clear further than the affected area of the basecoat), then just clear over all of that and pray.
The only issue coming to mind is that at the edges of the repaired area the newly added color will technically be on top of a light feather edge of clear... no idea how that's going to react or shrink down the road.

I can't imagine every single time someone paints their car they have to get it right the first time all over and not be able to repair the base underneath should anything happen without stripping the whole thing down to bare metal. I mean how would one fix metallic paint jobs which can't even be repaired at the basecoat level without messing up the flake lay?

I'm gonna give it a few days, and unless i hear otherwise I'll give it a shot and hope for the best...
 

Russ69Runner

Well-Known Member
Joined
Aug 4, 2016
Messages
7,795
Reaction score
3,352
Location
Lake Wales Fl.
That is sad to here. Yes with clear on it is hard to do any thing. Had some problem's with base coat too dark down the middle of the roof. So wet sanded it till I was almost out of it. Took it to the sail panels then painted it again feather it into the sail panels. Sound's like your paint is a tricky one. Had a problem with a fender but was able to find a cut in line and sanded the run out of the base coat and shot it again and it worked out well. Wish you luck but had not head of the color changing when wet sanding on it. :(
 

RKNRLR

Well-Known Member
Joined
Mar 27, 2017
Messages
705
Reaction score
653
Location
Sydney, Australia
Mate I dont know the answer to your problem here, but I sure hope you manage to correct what has happened without too much heartache.
 

roadrunninMark

Well-Known Member
Joined
Jan 14, 2011
Messages
192
Reaction score
155
Location
GA
I would take it to an expert paint shop or haven them stop by and give you advice. The pros usually know a lot of tricks and have painted many cars. I am sure there is someone near you that can tell you how to fix it.
 

Zizzinator

Member
Joined
May 26, 2020
Messages
22
Reaction score
37
update:
stripping it all down to the basecoat is the only option left now.

Trying to do a spot repair failed epicly... looked good at first but the shade of orange is just a monster in of itself...

The trouble spot now is that with the underlayer to the new sprayed spots being the orange color and clear it is now extremely light compared to the surrounding color under clear which has a primer grey as the lower color, giving it a slightly darker shade once cured. on top of that areas where i sanded the clear down but not all the way through to base there is literally a visible shadow under feathered edge where the clear is just thick enough still to leave a gap between the original base and the newly feathered edge...

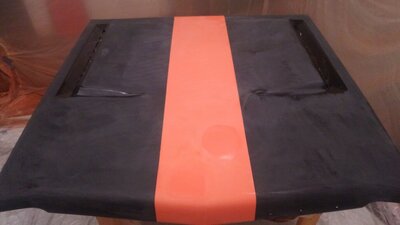
so with no other choice I'm forced to strip the driver side door, both fenders, and the hood center stripe all the way down with an orbital. re-spray the basecoat for the entire panel as a single piece with no clear under it and hope that works.

And before it's mentioned, the paint is the exact same can and mix I used for the rest of it. it just does not like to stay the same shade or color under any circumstances. honestly if it didn't looks so damn good I would have gone with a plain old white or solid singlestage color and been done with it. I'm glad i requested 2 gallons be mixed so i have plenty of extra.
 

Russ69Runner

Well-Known Member
Joined
Aug 4, 2016
Messages
7,795
Reaction score
3,352
Location
Lake Wales Fl.
That is really bad. Darn it man wish I had a good answer for you. Nothing worst than a paint job gone south on you. Like someone said before talk to some local paint shop's and see if they have an answer for you. Good luck. Russ. :(
 

Plybeep68

Acceleratii Incredibus
Joined
Jul 17, 2017
Messages
375
Reaction score
397
How much does the weather/humidity effect the color when your spraying?
 

Zizzinator

Member
Joined
May 26, 2020
Messages
22
Reaction score
37
How much does the weather/humidity effect the color when your spraying?
I haven't noticed much difference in the color due to the temp or humidity. I'm running a medium slow UR50 thinner for the basecoat which is rated from 70-80F at 50% humidity. My shop doesn't have A/C or much in the way of ventilation besides a few box fans. But I'm also not seeing much variation due to the temps or humidity from one spray session to another. max temp I've seen so far is 95F and weather report said it was about 70% humidity for a few days. paint laid down just as good (in the base coat stages of painting) as days where the temps were in the low 80's and humidity was near 20%.

The color differential I'm seeing is more to do with the layering under the orange and the way the orange itself lays and dries as a weird color shifting mix.

In the words of the paint store I got it mixed in "it is one of the worst colors they have ever had to try and match and mix". It took them 2 weeks to even come close to matching the sample I gave them, and even then the best mixing option was not using a formula by individual color parts but by mixing 2 separate orange formulas in a weight by weight % per volume. As in one would think if it was (for example) a 1:1:2 or red, yellow and white, you could mix the colors in that ratio and it would match.... nope. gotta mix a 1:3:5 formula with a 1:2:1 in a way that gives the same ratio of 1:1:2 weight wise for it to match. super freaky, and honestly if I didn't have the paint samples in front of me in the store at the time I wouldn't have believed it either.
 

Zizzinator

Member
Joined
May 26, 2020
Messages
22
Reaction score
37
Figured I should give some updates.
So the door strip down and re-spray went well. I would give it a solid B+, a few spots where the paint gun spit a bit of dried clear coat crud out of the nozzle (only so much cleaning and soaking in acetone will clean out the passages) but overall not too bad. The basecoat looked like an absolute turd surface finish wise, once the clear was down it evened right out. most of the spatter and crud can be wet sanded out and buffed clean. it's not concourse quality but should stand up to most resto jobs. The black on the doors is a nice deep deep color. even without wet sanding and buff i can read the lettering on the 14' ceiling lights in the reflection.

The hood... not so much. I would give it a respectable B-. but nothing to print out and hang on the refrigerator for. The orange came out solid and even with nice clean lines along the black. Where i should have spent a bit more time was sanding the base coat to a perfectly flat level (before obv. re-spraying once more). There are some areas along the side of the stripes where there is a bit of thickness and waviness in the finish visible. I have a feeling most of it will cut and buff out since it's the clear bringing the surface imperfections up to the top (at least I am hoping. Where I would downgrade it to a C+ grade wise is, right on the front edge where the nose curls over I tried to clean as much of the tape and gunk from the black as I could with alcohol (since that won't eat the clear). when i wiped it down good it looked clean. even let it dry, tecked with a clean cloth and wiped it a few more times. As soon as sprayed i could immediately see bits of glue and orange flecks. little bits that just got caught in the tiny fisheyes and surface imperfections of the first pass clear. And... now those are sealed under 2 layers of clear. there are also a few swirl scratches in the black right on the edge with the orange from when i stripped the orange's clear off that carried through through to the top layer of clear. most of it you won't see from more than 2 ft away, but it catches my eye like it's a bit of smutchz or dirt on the surface.
I can't get them to appear in pictures (camera won't pick them up) but it'll catch your eye if you see it in person when looking for it. not gonna cry over that spilt milk though, it's much better than what the car started out as, and i can live with a few mistakes.

The fenders.... passenger side is a D+... maybe D grade.
gonna have to have a professional strip them down and re-spray at least one of them completely. I attempted a smaller repair spot for the orange, stripping it down to the base and building it back up as I did with the hood and door. But because i didn't carry it all the way across the panel there is a distinct vertical line where it ends and the first set of paint begins. Did not smooth into the original paint at all and there are some nasty scratches in the old basecoat where i had sanded it down. It's a real pain in the ass but at this point I'm just trying to get the car in clear to move it out of the shop. The fenders can be fixed at another time once its safe in another location.

The driver side fender is closer to a C-. I had a bit more luck with because I did strip the whole panel section down. where it could have been better is the match between the new paint and original along the crease line. it's not perfect and I honestly won't know if it looks "off" until i mount it to the shell and see it in the sunlight. First looks at it don't really catch my eye, bu as I've learned. seeing it inside and seeing it outside is like night and day.

I have a feeling the second batch of orange mixed up is just ever so slightly lighter than the first. Not enough that panels won't match at all, but enough that directly next to one another on the same flat surface the color shift is apparent. Sort of the be expected since it's such a complex color no one in their right mind would think it would be a perfect match everytime it's mixed. Meaning, whoever I end up getting to re-do the panels is going to have to do some color matching starting with the formula i give them and "making it work".

other than that, a few splotches and runs on the tail extension clearcoat and base. I think if I were to do those again i would have clear coated them while they're attached to the shell rather than separately. it would help with evening out the coats of clear.

Gonna be prepping to spray the shell this weekend and should have some pics for you either early next week or the following weekend.
 

Russ69Runner

Well-Known Member
Joined
Aug 4, 2016
Messages
7,795
Reaction score
3,352
Location
Lake Wales Fl.
When you paint one of these boat's you need at least two gallon's of paint which equal 4 gallon's of mixed paint. I did that and still had to get another gallon of paint. These car's do take a lot of paint. But if you paint one all put together you have a hard time getting paint into like door jambs and Painting hinges and a lot of stuff. Now we know why it take so long for the paint shop to do these car's. Glad to here things have worked out for you. We just try so hard to make them perfect. They where not perfect from the factory either. :beep:
 

1968 man

Well-Known Member
Joined
Jan 15, 2020
Messages
873
Reaction score
1,146
Location
Columbia South Carolina
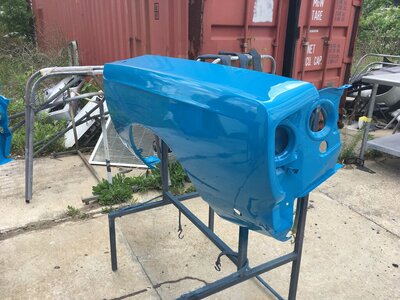
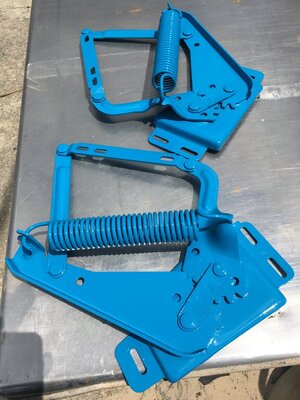
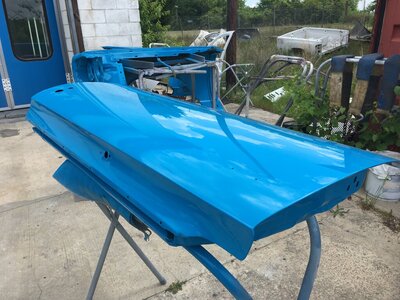
I feel your pain Zizzinator I painted all my panels and parts off of the shell and it was tough. Keep at it and you will get it, good luck. 4083A199-F091-4C73-8686-4F61FE3612E0.jpeg68223BDF-90E2-43F3-ABE8-2B51082179FE.jpegA708FCB3-5D2A-44B4-B7AE-FCC33D12FC91.jpeg1962F801-79A1-4680-9809-0828785F74A0.jpegC279D679-D317-4C43-8E81-8A0B6E1C2FDB.jpeg21391386-4118-4576-AF05-FFE684FADDEC.jpeg606EC62C-6C46-4080-A758-C1F3135323AA.jpegCB5F71CB-0AC2-4C93-B54E-4F5FD083F200.jpeg16417254-CEB8-4DE0-A82D-41C18D45AA01.jpeg
 
Back
Top