I would appreciate all the advice you could give me.
What you have posted on this so far is a big confidence boost.
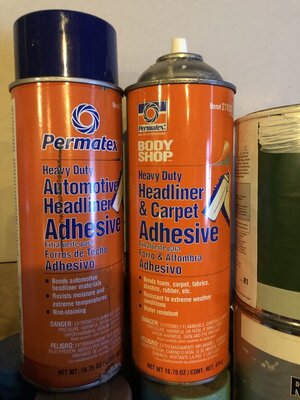
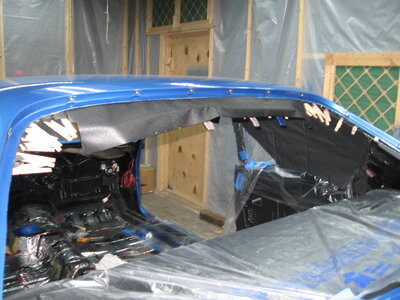
So, first thing I did was insulate the roof of the car with foil backed “fanfold” 1/4” thick insulation that I got from Home Depot. I pre-cut the pieces to fit between the braces of the roof, and used the spray adhesive I pictured above on the foil side, and some on the roof, then fit the pieces into place. They tack right away, and it doesn’t take long to get this done. Now, onto the headliner...
First thing I did was lay out my new headliner on a flat surface, upside down so the back was facing up. I folded it in 1/2 and marked the center on the front and back with a sharpie. Then opened it up and laid it flat again, and took my old headliner and laid it on top of it with the back also facing up, and lightly marked the perimeter of the old one onto the new one. This helps when you’re pre-spraying the adhesive onto the new headliner to have a guide as to where it should go. If you don’t have your old headliner, it’s not the end of the world. Next I took the bows out of my old headliner and put them into the new headliner one by one, making sure they go back in the exact same order. You will notice that the sleeve that the bow goes in is tight on the bow at each end, so you need to snip back the sleeve about 1 1/2” on each end, so the headliner doesn’t follow the bow down into the socket that the bow goes into.
Next, I turned to the car and made sure that all of the edges were clean where the headliner is going to attach on the tooth strips, and I used some plastic to cover the front and rear window to limit the overspray of the adhesive. I also made sure that the tensioning hooks were on location, but not in their holes yet. I also put in all of the screws that hold the sun visors, rear view mirror, coat hooks, dome light, and shoulder strap hooks (if your car has shoulder belts), and measured where the seatbelt holes were for the shoulder belts. I also marked the center of the rear window, and the front window as well, to give reference to the center marks I made on the new headliner. When you are satisfied that everything is clean and marked you are ready to spray the adhesive. The adhesive has a 15 minute tack time, which gives you time to work with the headliner, and it isn’t so tacky that you can’t peel the headliner off and and work with it in case you need to shift things a little. I spray both the back of the headliner around the perimeter, and also the outer lip and the teeth. Don’t go crazy, you don’t need a bunch, and some people don’t use any at all. I used a piece of cardboard as an additional shield when spraying the lip and teeth of the car.
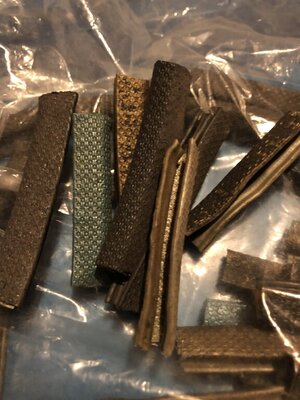
Now, onto the installation. Insert the tensioning hooks into their slots on the rear lip, and hook the rear bow around them. Hook the rear bow into the sockets on the sides and pull the headliner forward from the middle, do this same thing one bow at a time, to pull tension on the hooks and the headliner. Don’t be surprised if the bows tip forward, they don’t stand straight up per se, and when you get to the front, line up your center marks and hook the center of the headliner around the teeth. You are only concerned with the center of the headliner at this time. If you need to clip the center in the front to help hold it, by all means do it. You can use clothes pins, those metal “office” clips, or something like the old welting piece I pictured above. Then go to the outside corner of the front and pull the headliner to the corner, making sure there is no wrinkling along the front between the center and the corner you’re working with. This will be the first step to centering the headliner and making sure it is not diagonally putting wrinkles into it. When that corner and the front between the center and that corner looks good, hook it over the teeth and clip it at the corner. Do the other corner the same way. Look at the entire front, and down the center to double check that you are looking good.go along the entire front and tuck the headliner onto the teeth, using something like a plastic bondo spreader or something of the like, with rounded edges and corners so you don’t poke a hole in the headliner.
When you’re satisfied with the front, it’s time to start working your way over the doors towards the back. Starting at the front corner you did first, go about 6” at a time and pull the headliner towards the outside to put tension on it. Don’t pull too hard, just enough to pull the wrinkles out between the bows you are working between. Hook the headliner over the teeth and clip it there, and continue working towards the back doing the same thing, when you get to the back where it turns to the sail panel, go to the other side and do the same, working front to back, once you have both sides done, and there are no wrinkles in the “field”, use the bondo spreader to set the teeth into the headliner. Now go to the back window and do the same thing as the front. Hook the center, clip that, go to the corner where the window turns down, hook and clip that, work between the corner and the center, and then do the other side and do the same. You should see little to no wrinkling in the “field” of the headliner, and if there are small wrinkles, you can work on them with a hair dryer later. Most wrinkles come when doing the sail panels, which are next.
If your car is a 70, you will have fiber board sail panels that clip in over the edge of the headliner, and the headliner will go under the sail panels about an inch or so and clip onto the teeth under the sail panel. The sail panel area is the toughest part of the headliner to get right without wrinkles, but after working on the field and getting a feel for working out wrinkles, some patience and a relaxed approach will pay big dividends in this area. It’s only about 1 square foot of material on each side, and you just did about 30 square feet of headliner, so you are almost done. Again, if there are small wrinkles you just can’t get out, don’t sweat it, you can let them sit and relax for a few days and hit it with the hair dryer and get them to relax.
Now it’s time to start installing some of the items like the sail panels, sunvisors and mirror, dome light, coat hooks and such, and start taking off clips. If you want to wait awhile to take off the clips, that’s ok, but you risk making an indentation there the clip was, because the glue will set up differently under the clip, but again, not a big deal. The more accessories you install, the less you need the clips to keep things in place.
So, there you have it, that’s what I did, and if anybody has anything to add, the more info the better, I’m sure I forgot something! Take your time and don’t get anxious, I know you can do it. It will give you a very big sense of pride doing this, and safe you a bunch of money that you can spend on wine, women and song, or more parts if you like! Good luck brother!
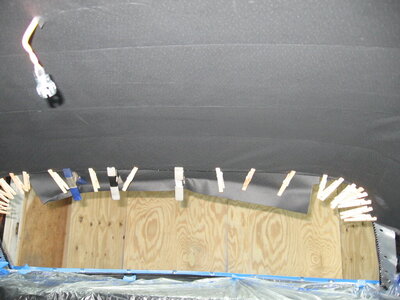
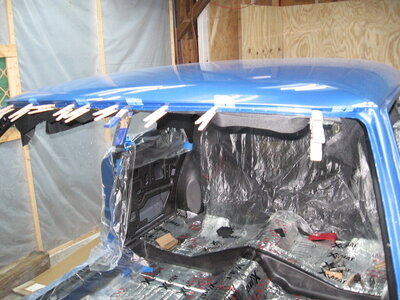
 Use a heat gun or hair dryer to get the wrinkles out or sag's if you have any. Don't get it too hot keep moving the gun or dryer.